The making of a mural, in chalk
11/09/2017Day 1: Setting the scene
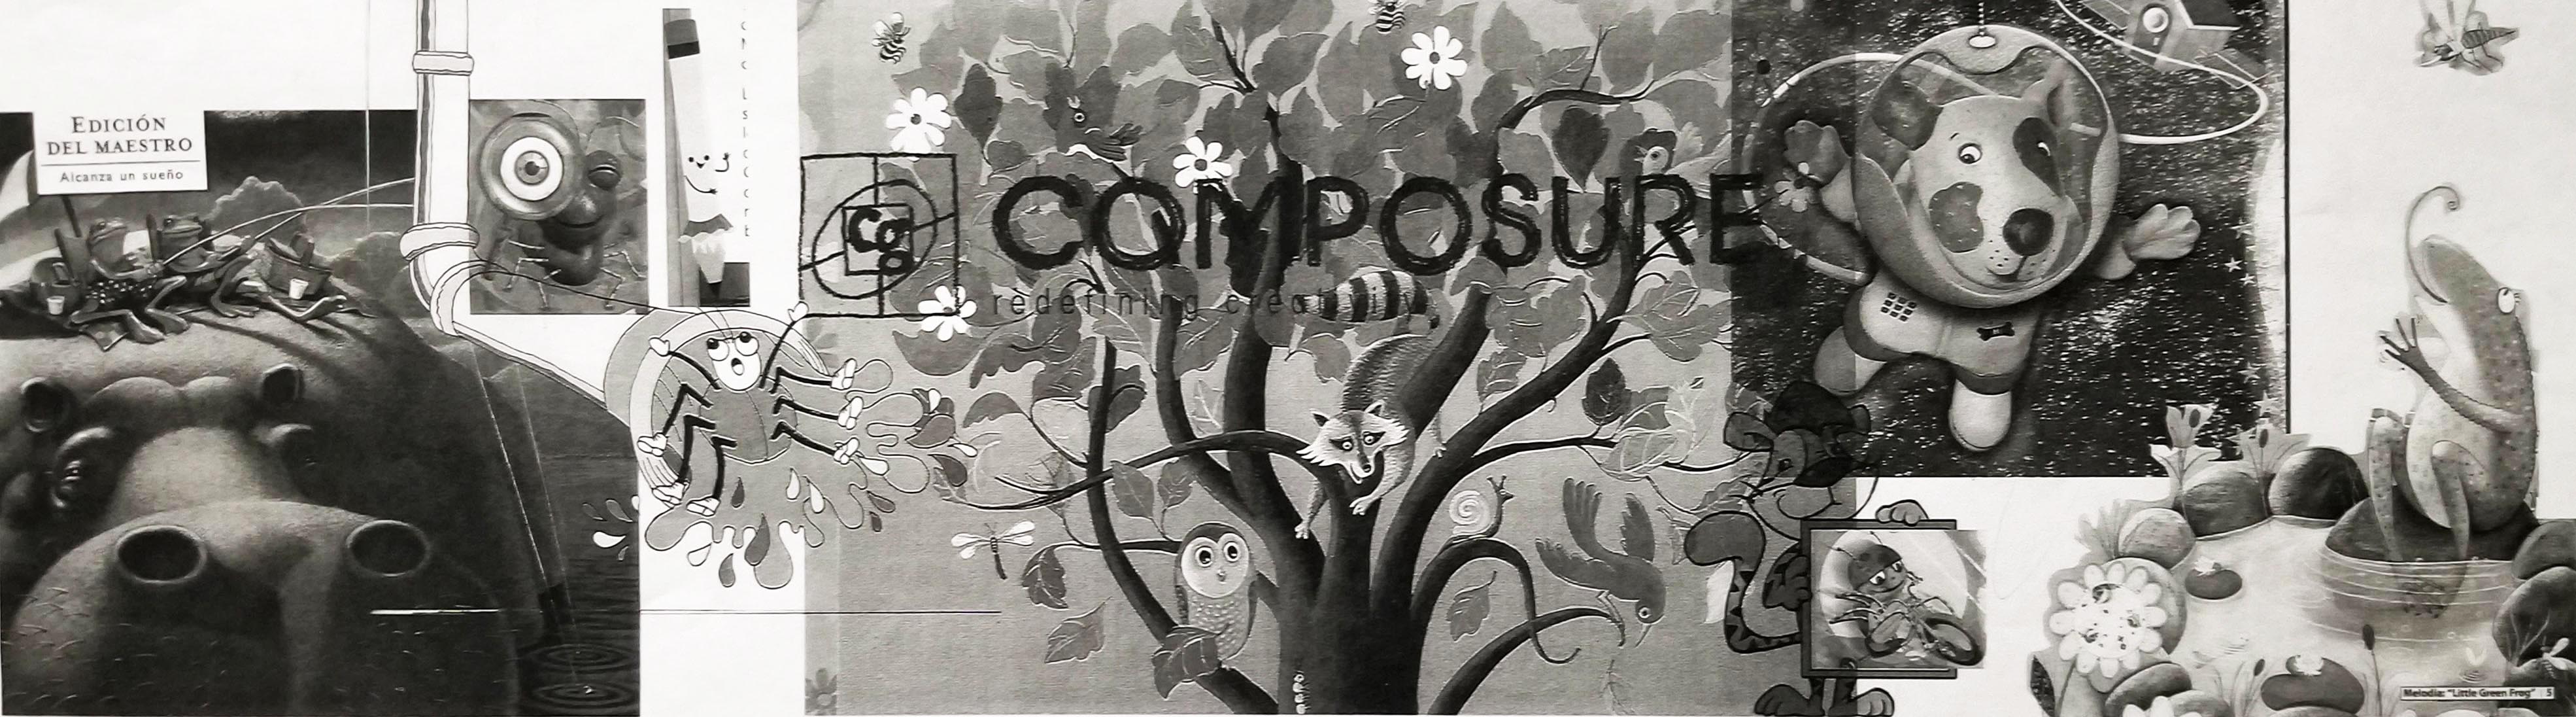
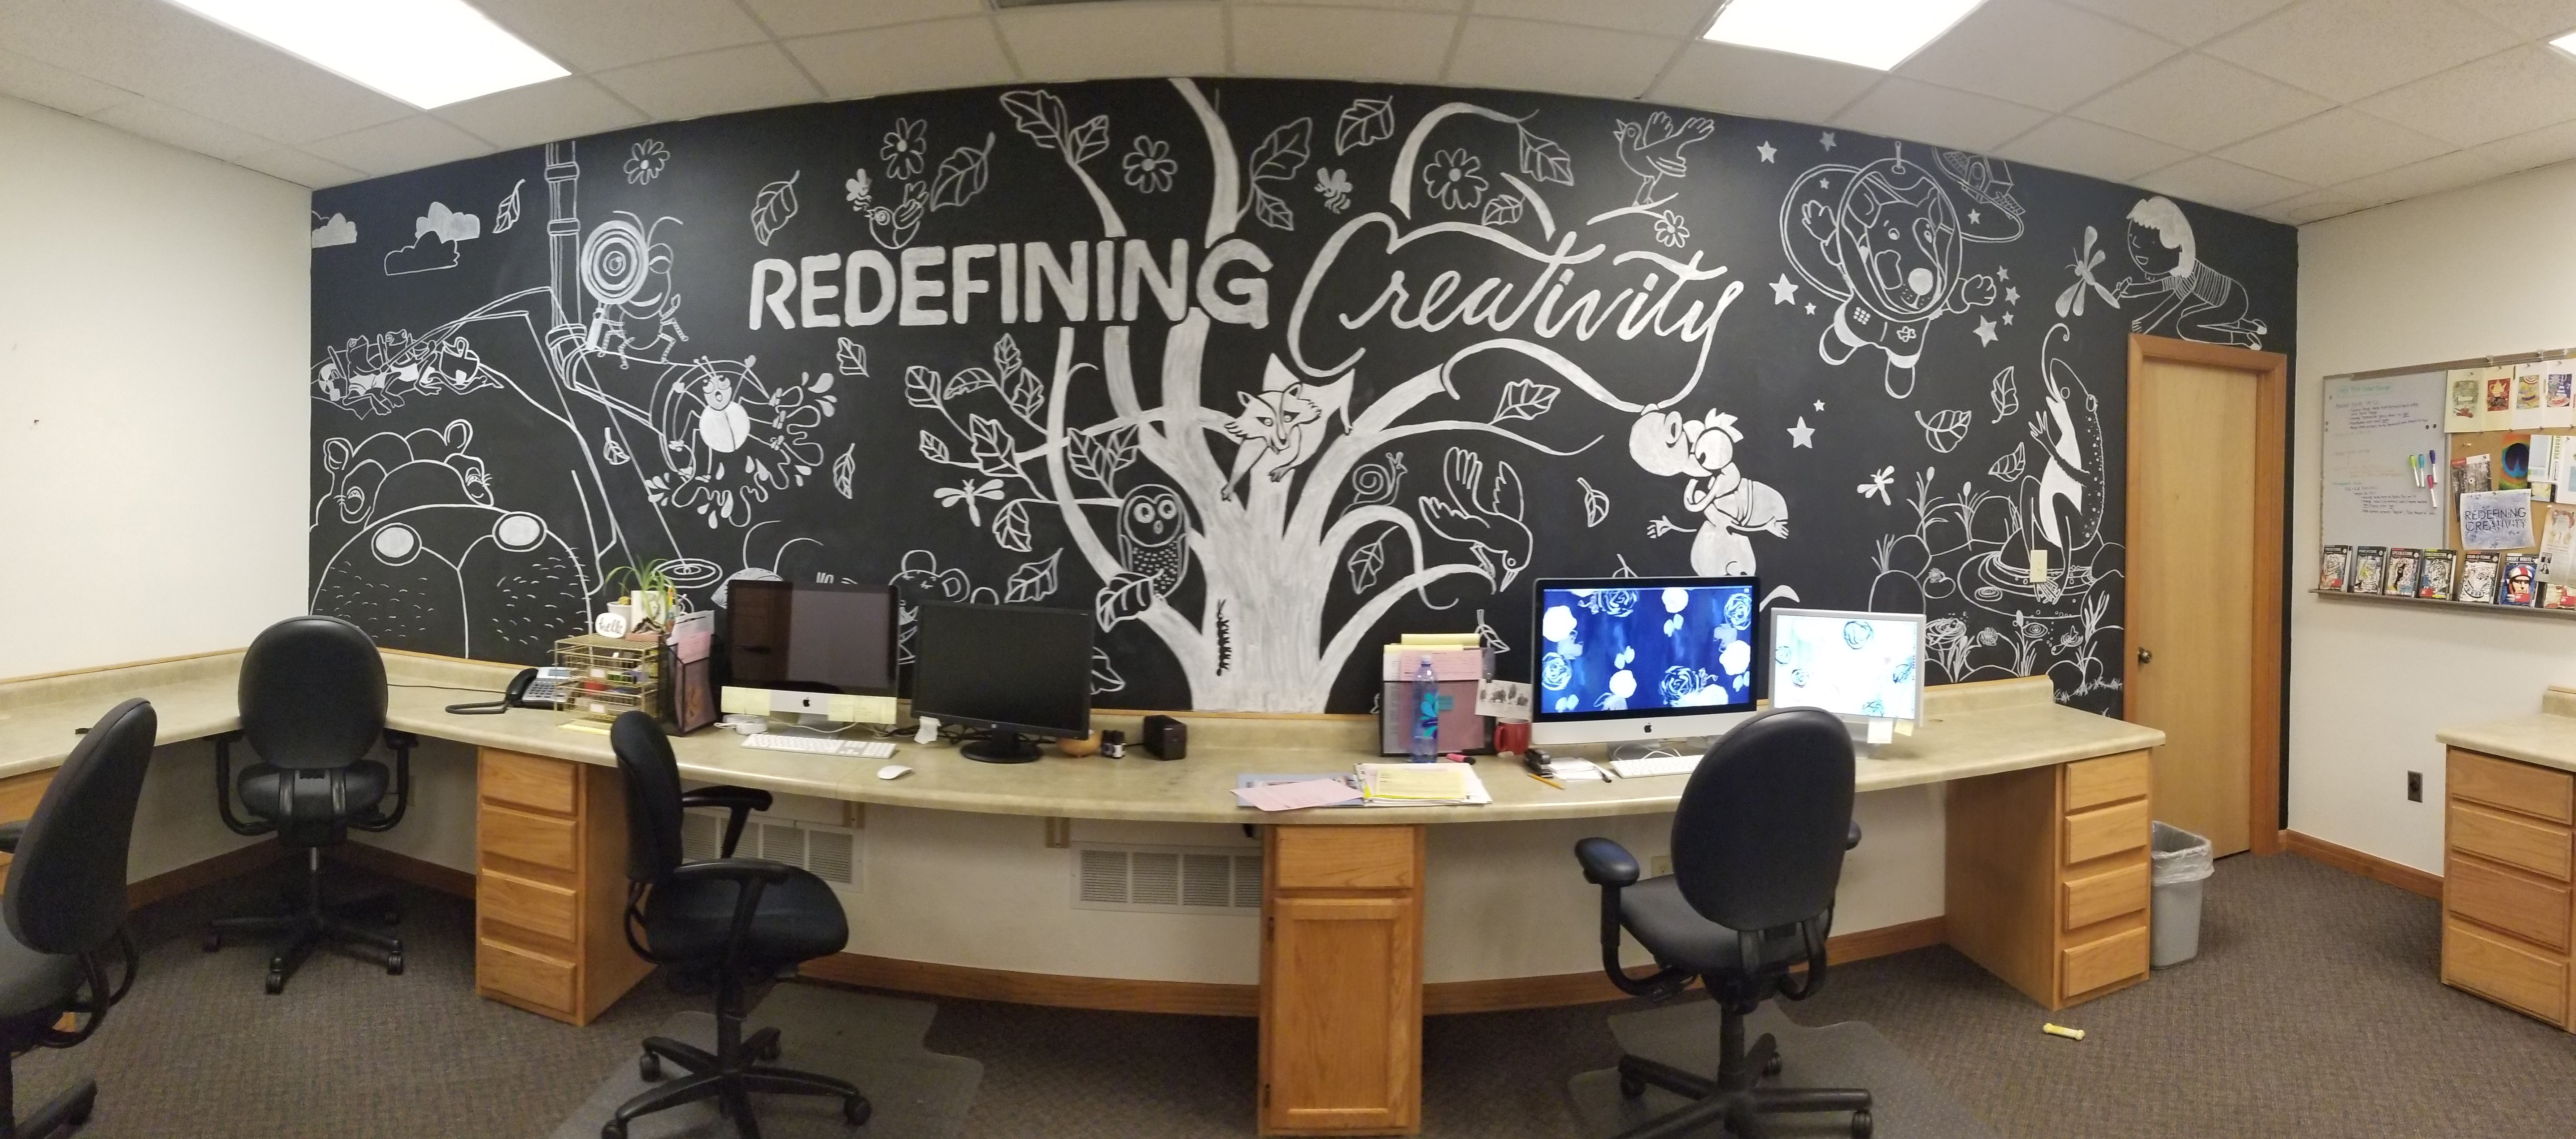
One of my first assignments at Composure was to create a wall mural. It was the largest piece of artwork I’ve ever done. It was slightly intimidating at first, but I was ready to take on the challenge. Here’s a behind the scenes look at creating my first chalk wall mural!
First, you must do the research. Pulling inspiration pieces is not only a great way to get your creative juices flowing, but helps create a starting point for what will become the finished work. As an inspiration point, I began to gather pieces from past projects, a wide mix of different works. I wanted to incorporate designs from all different clients and find a way to integrate them all together.
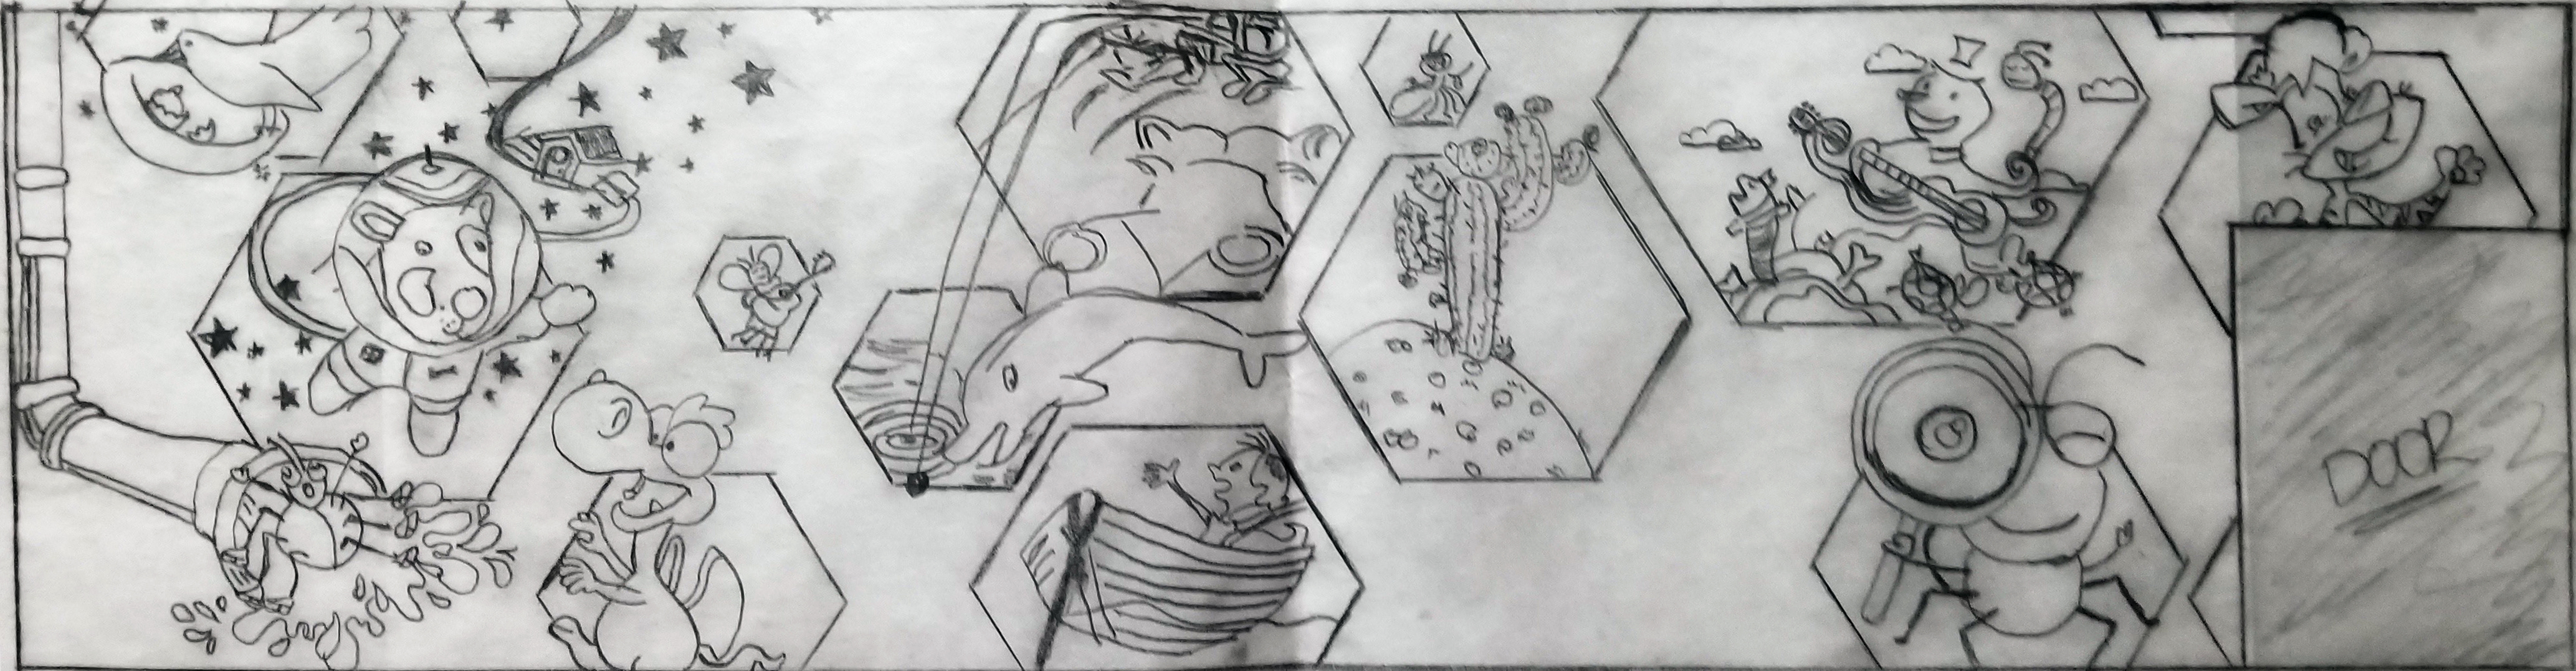
Creating a cohesive layout is like solving a puzzle. You start out with individual pieces and begin to find which pieces fit together, which pieces don’t.
The next stage was sketches. Once there was a collection of puzzle pieces pulled together. I began by sketching out different layouts to find one great solution. The sketch process is one of the most critical parts of creating a cohesive layout and can also make or break your design.
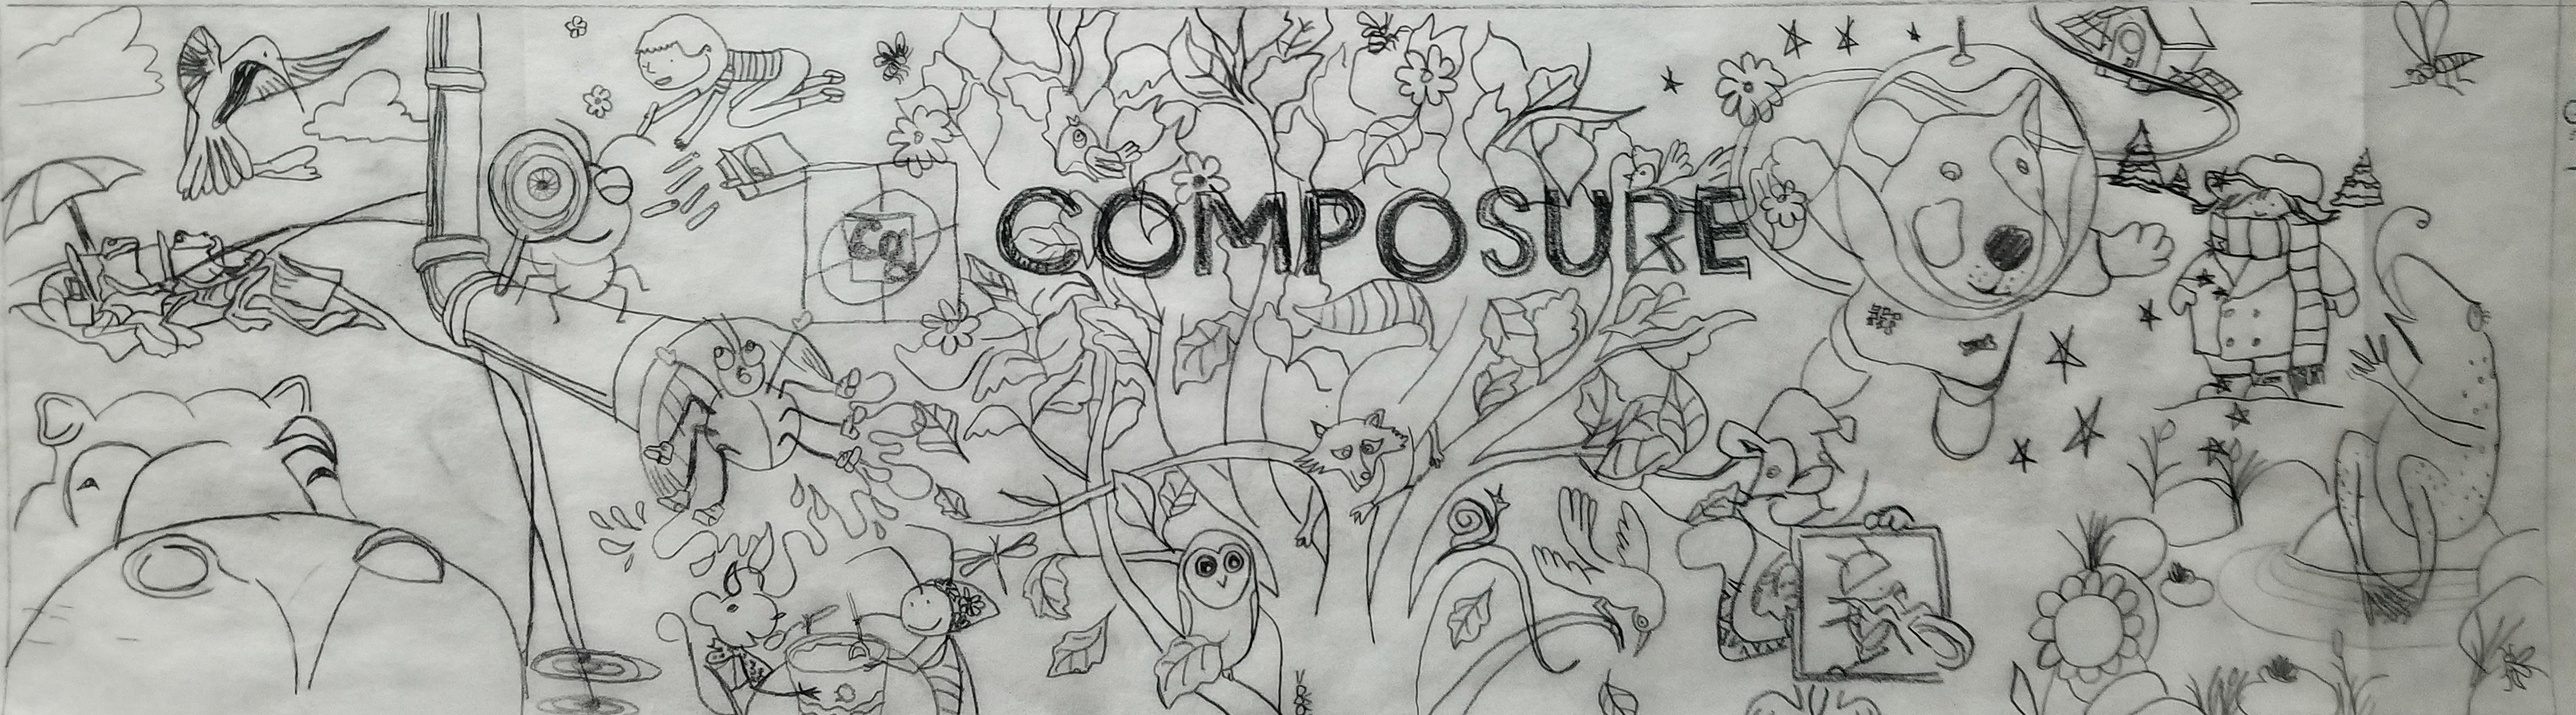

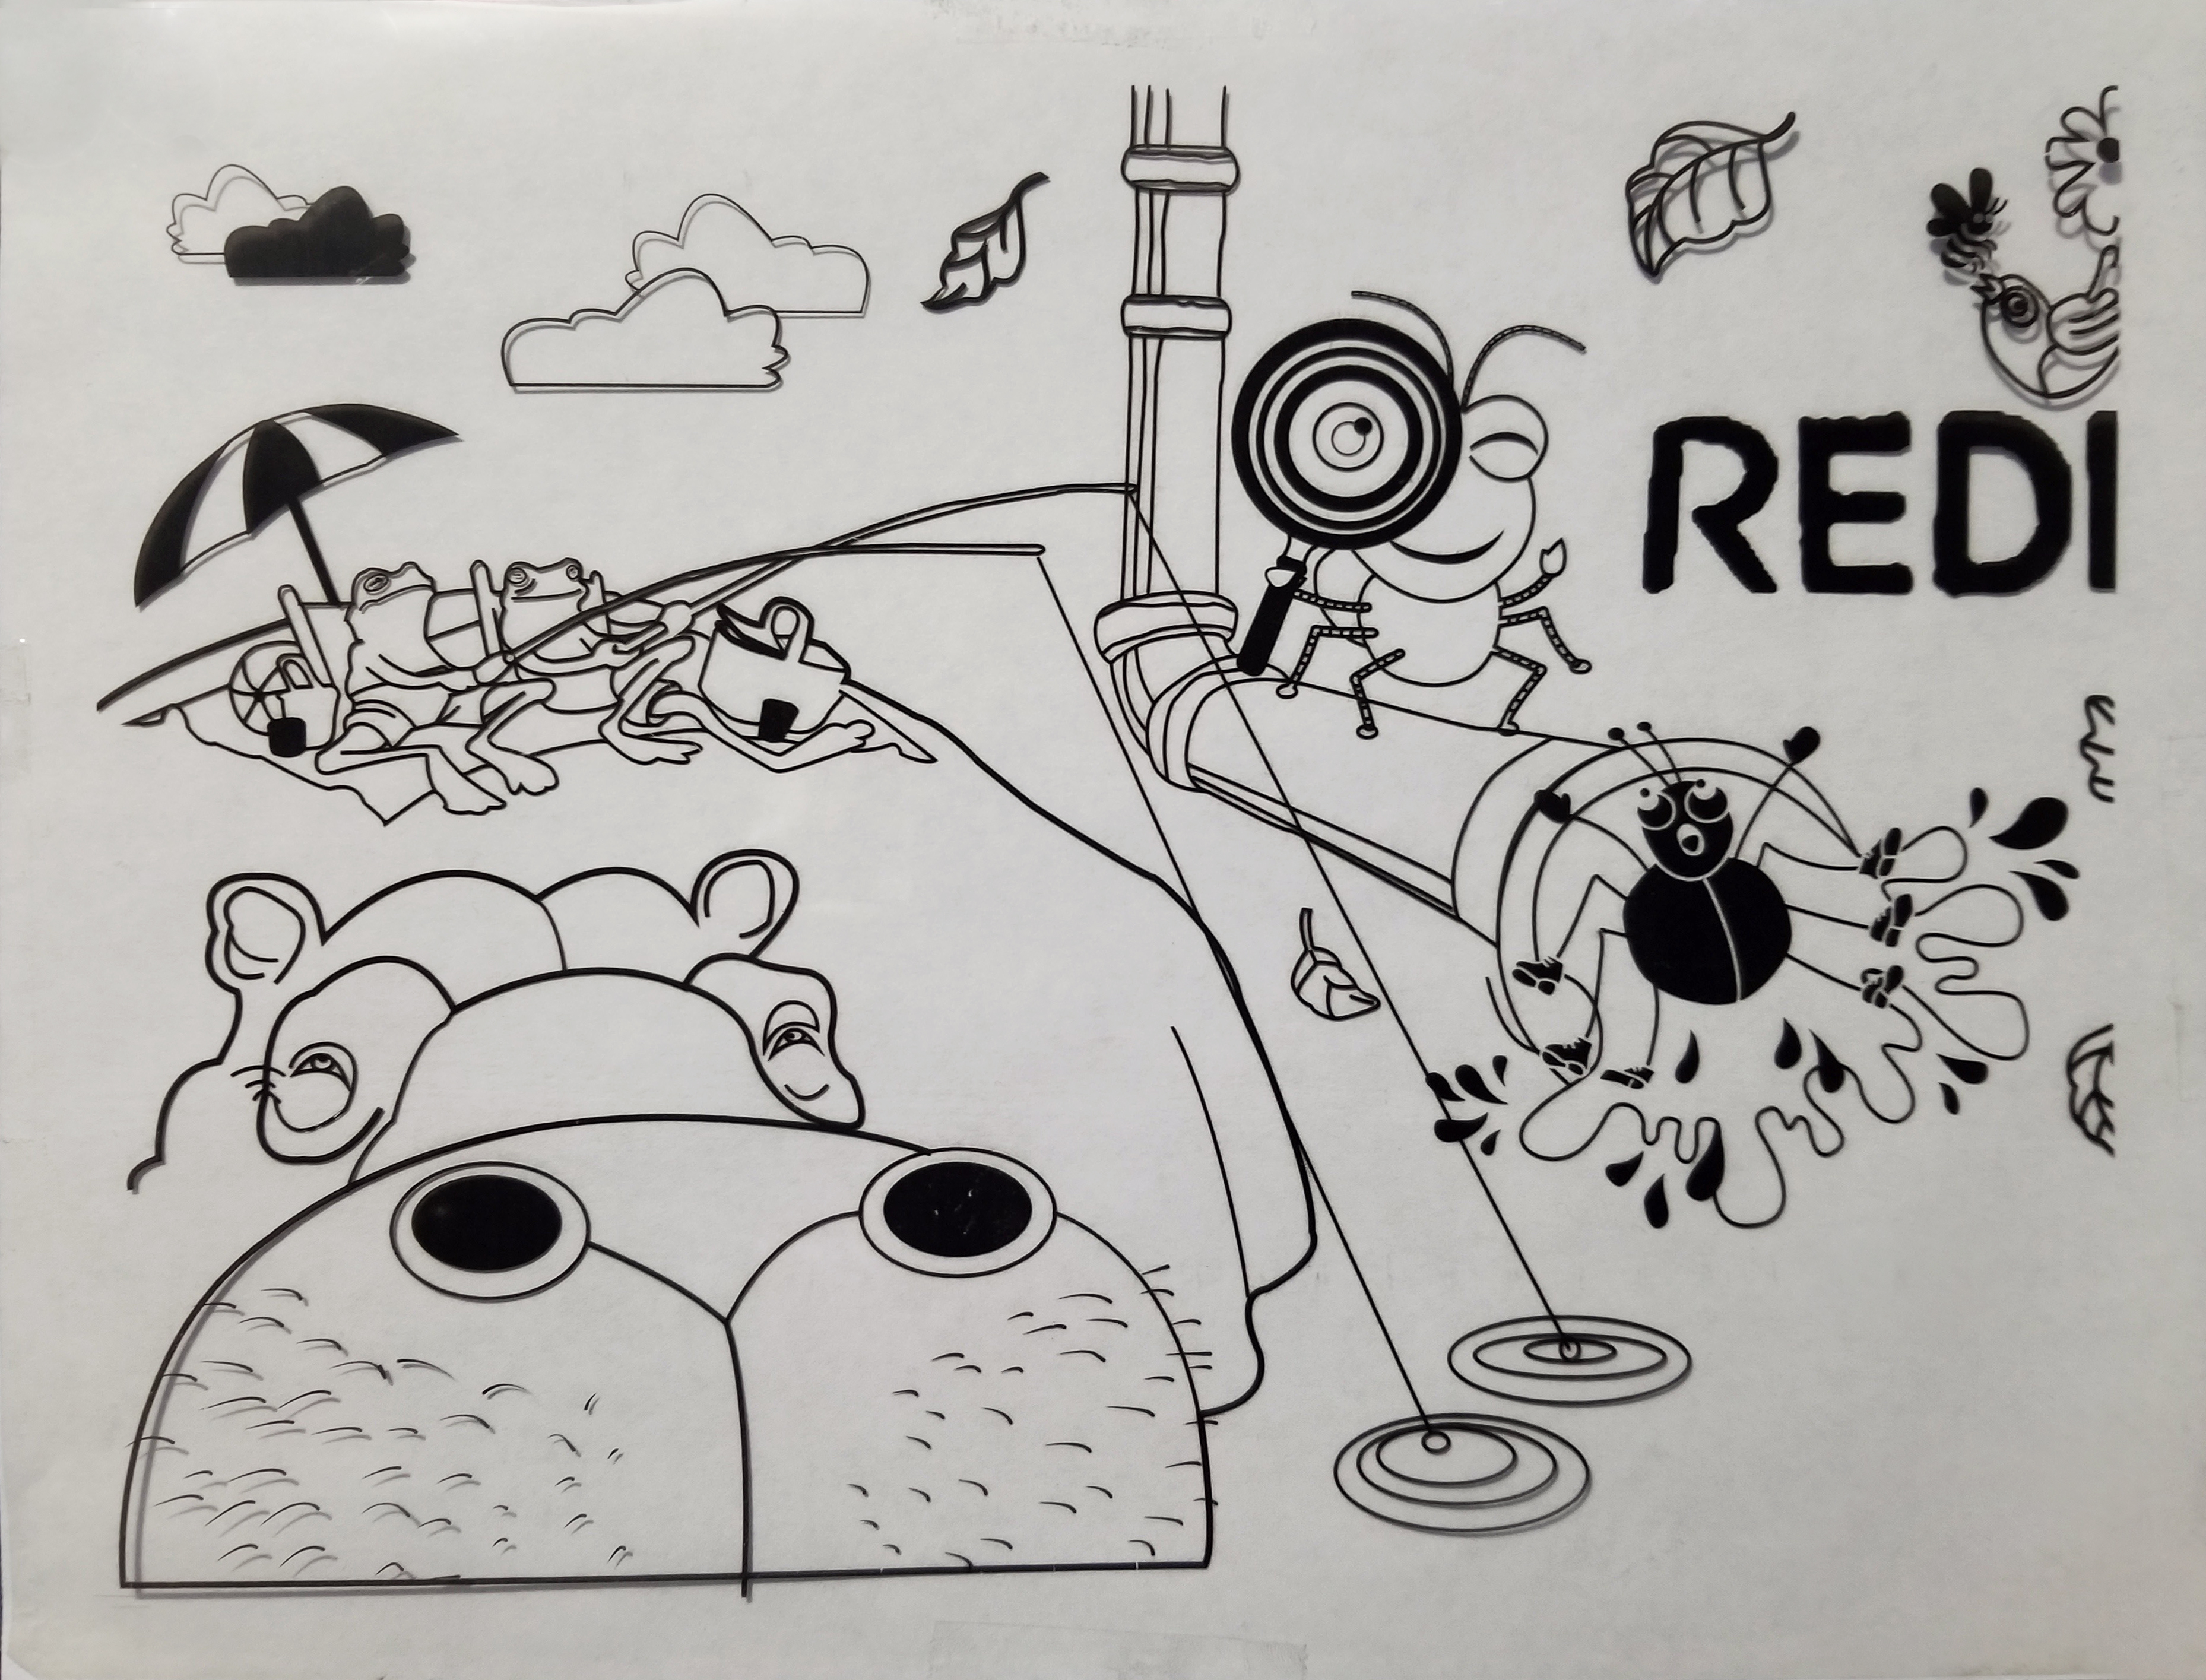
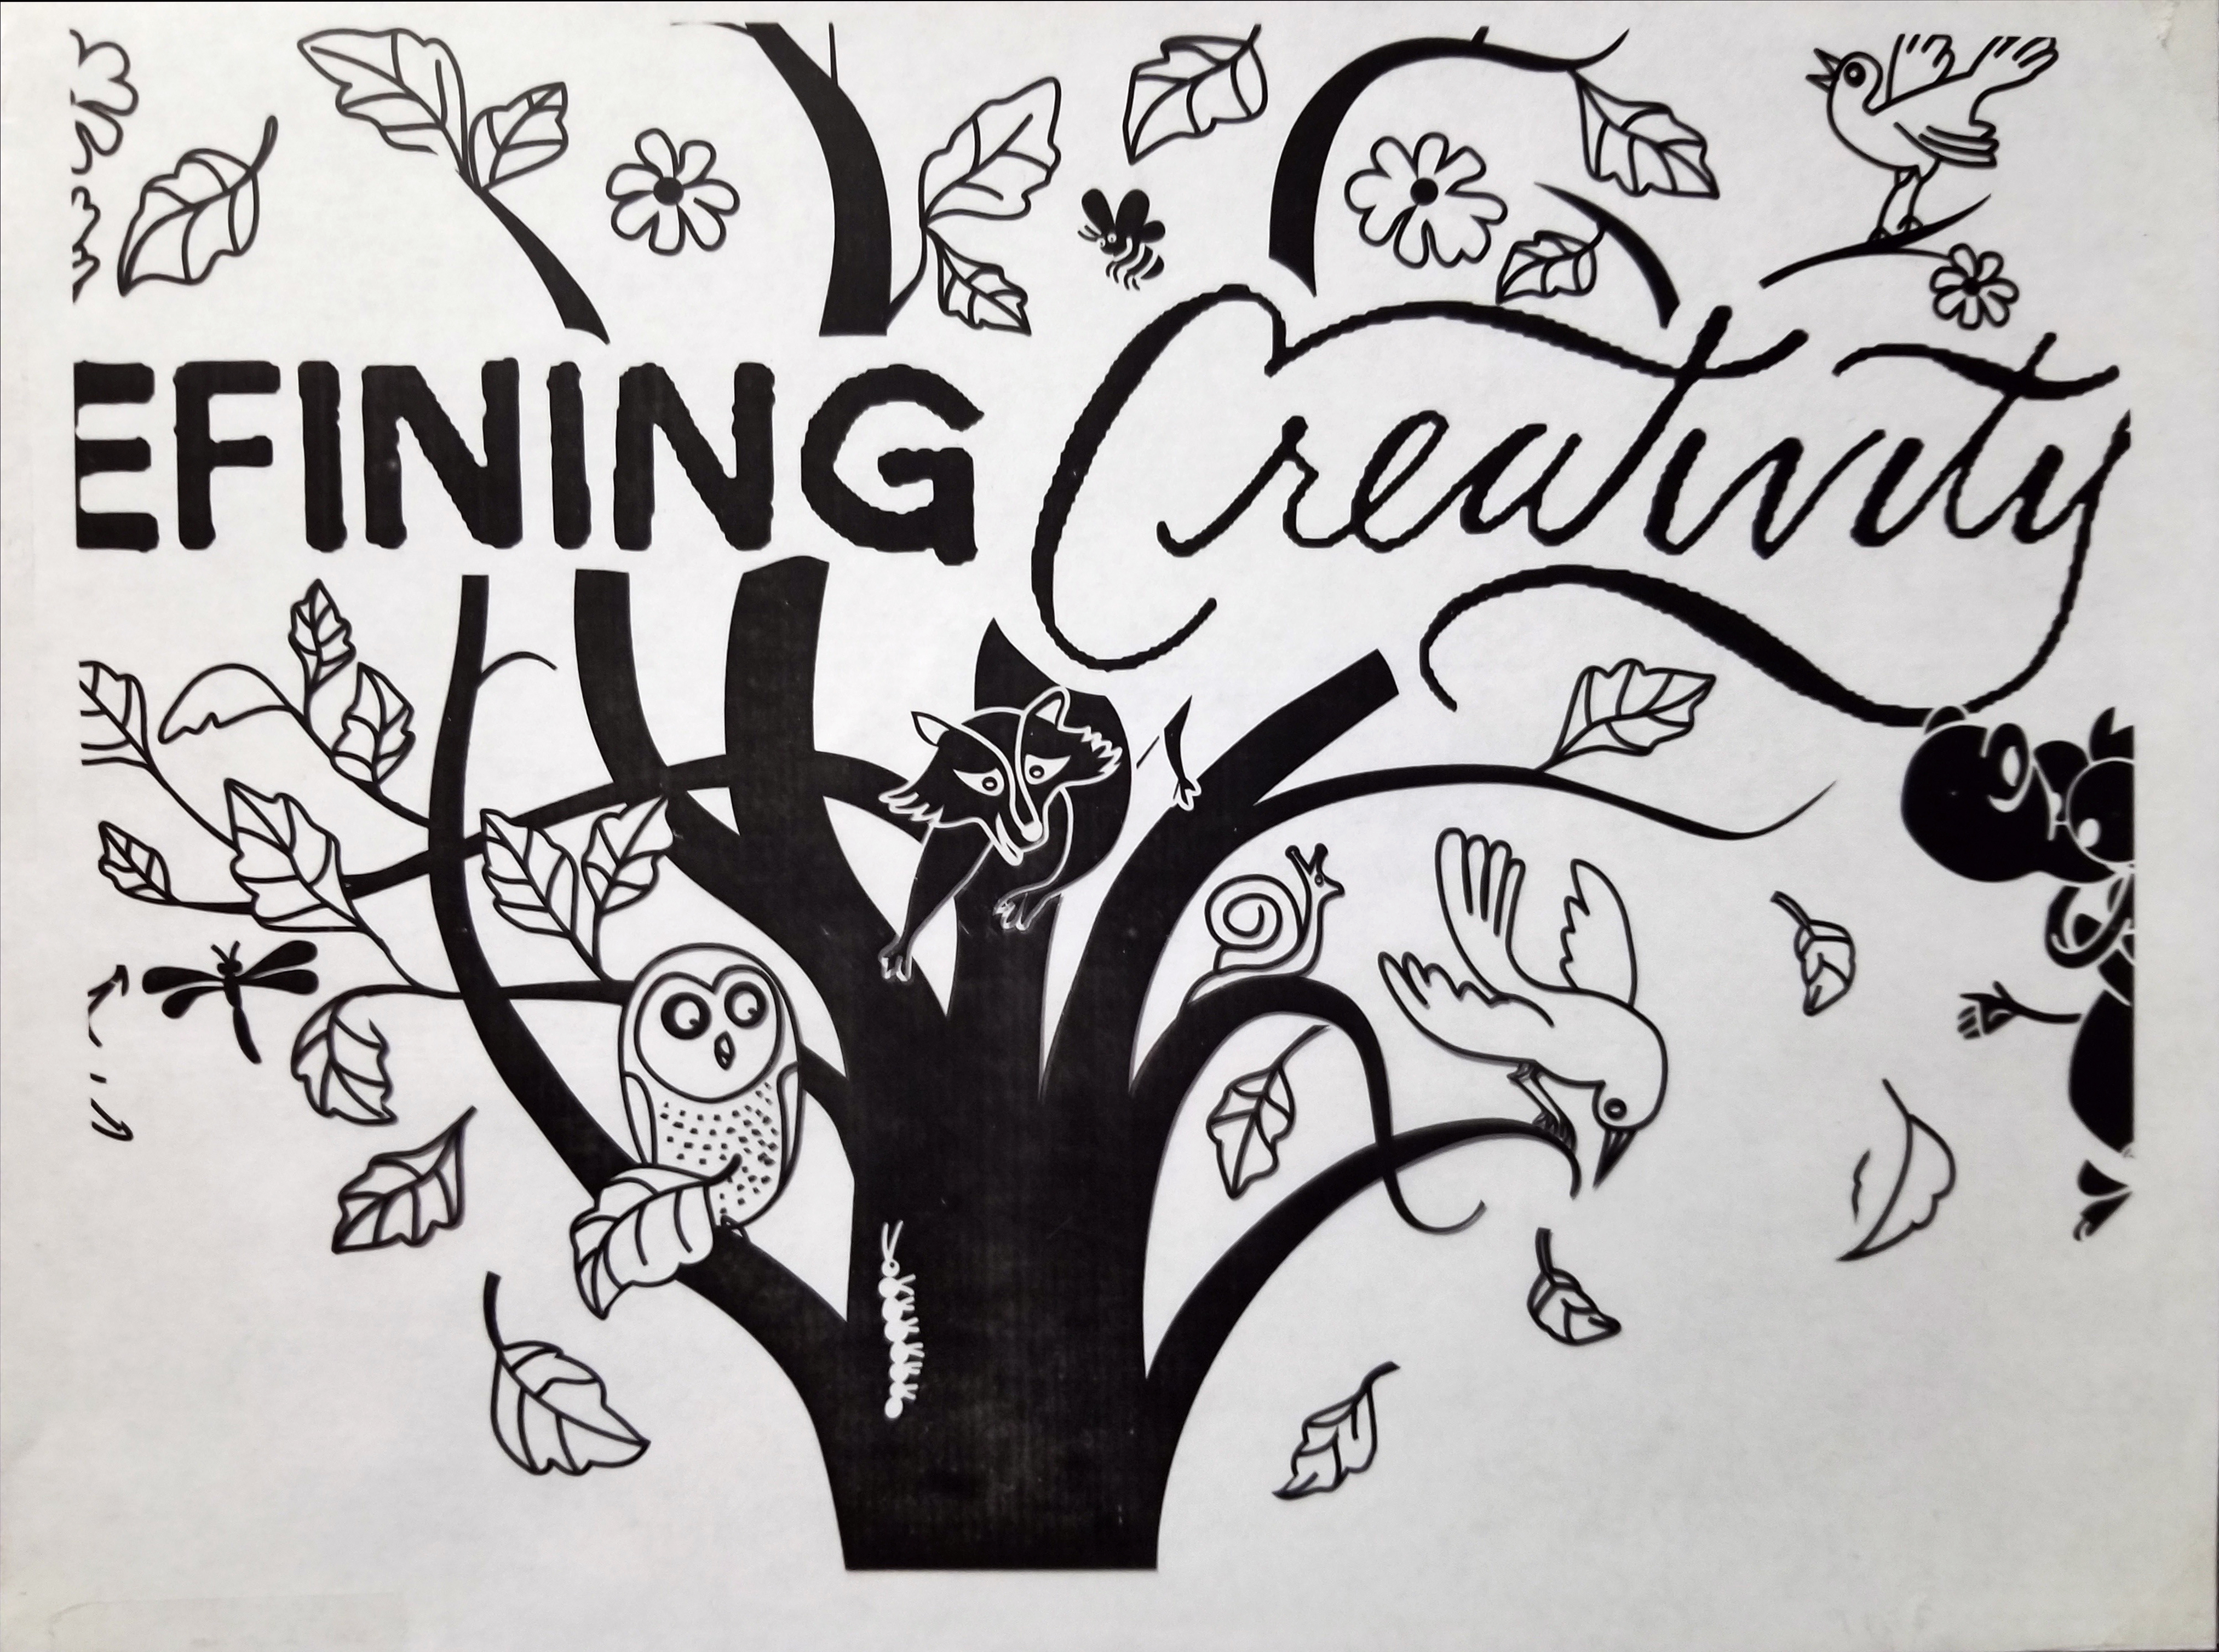
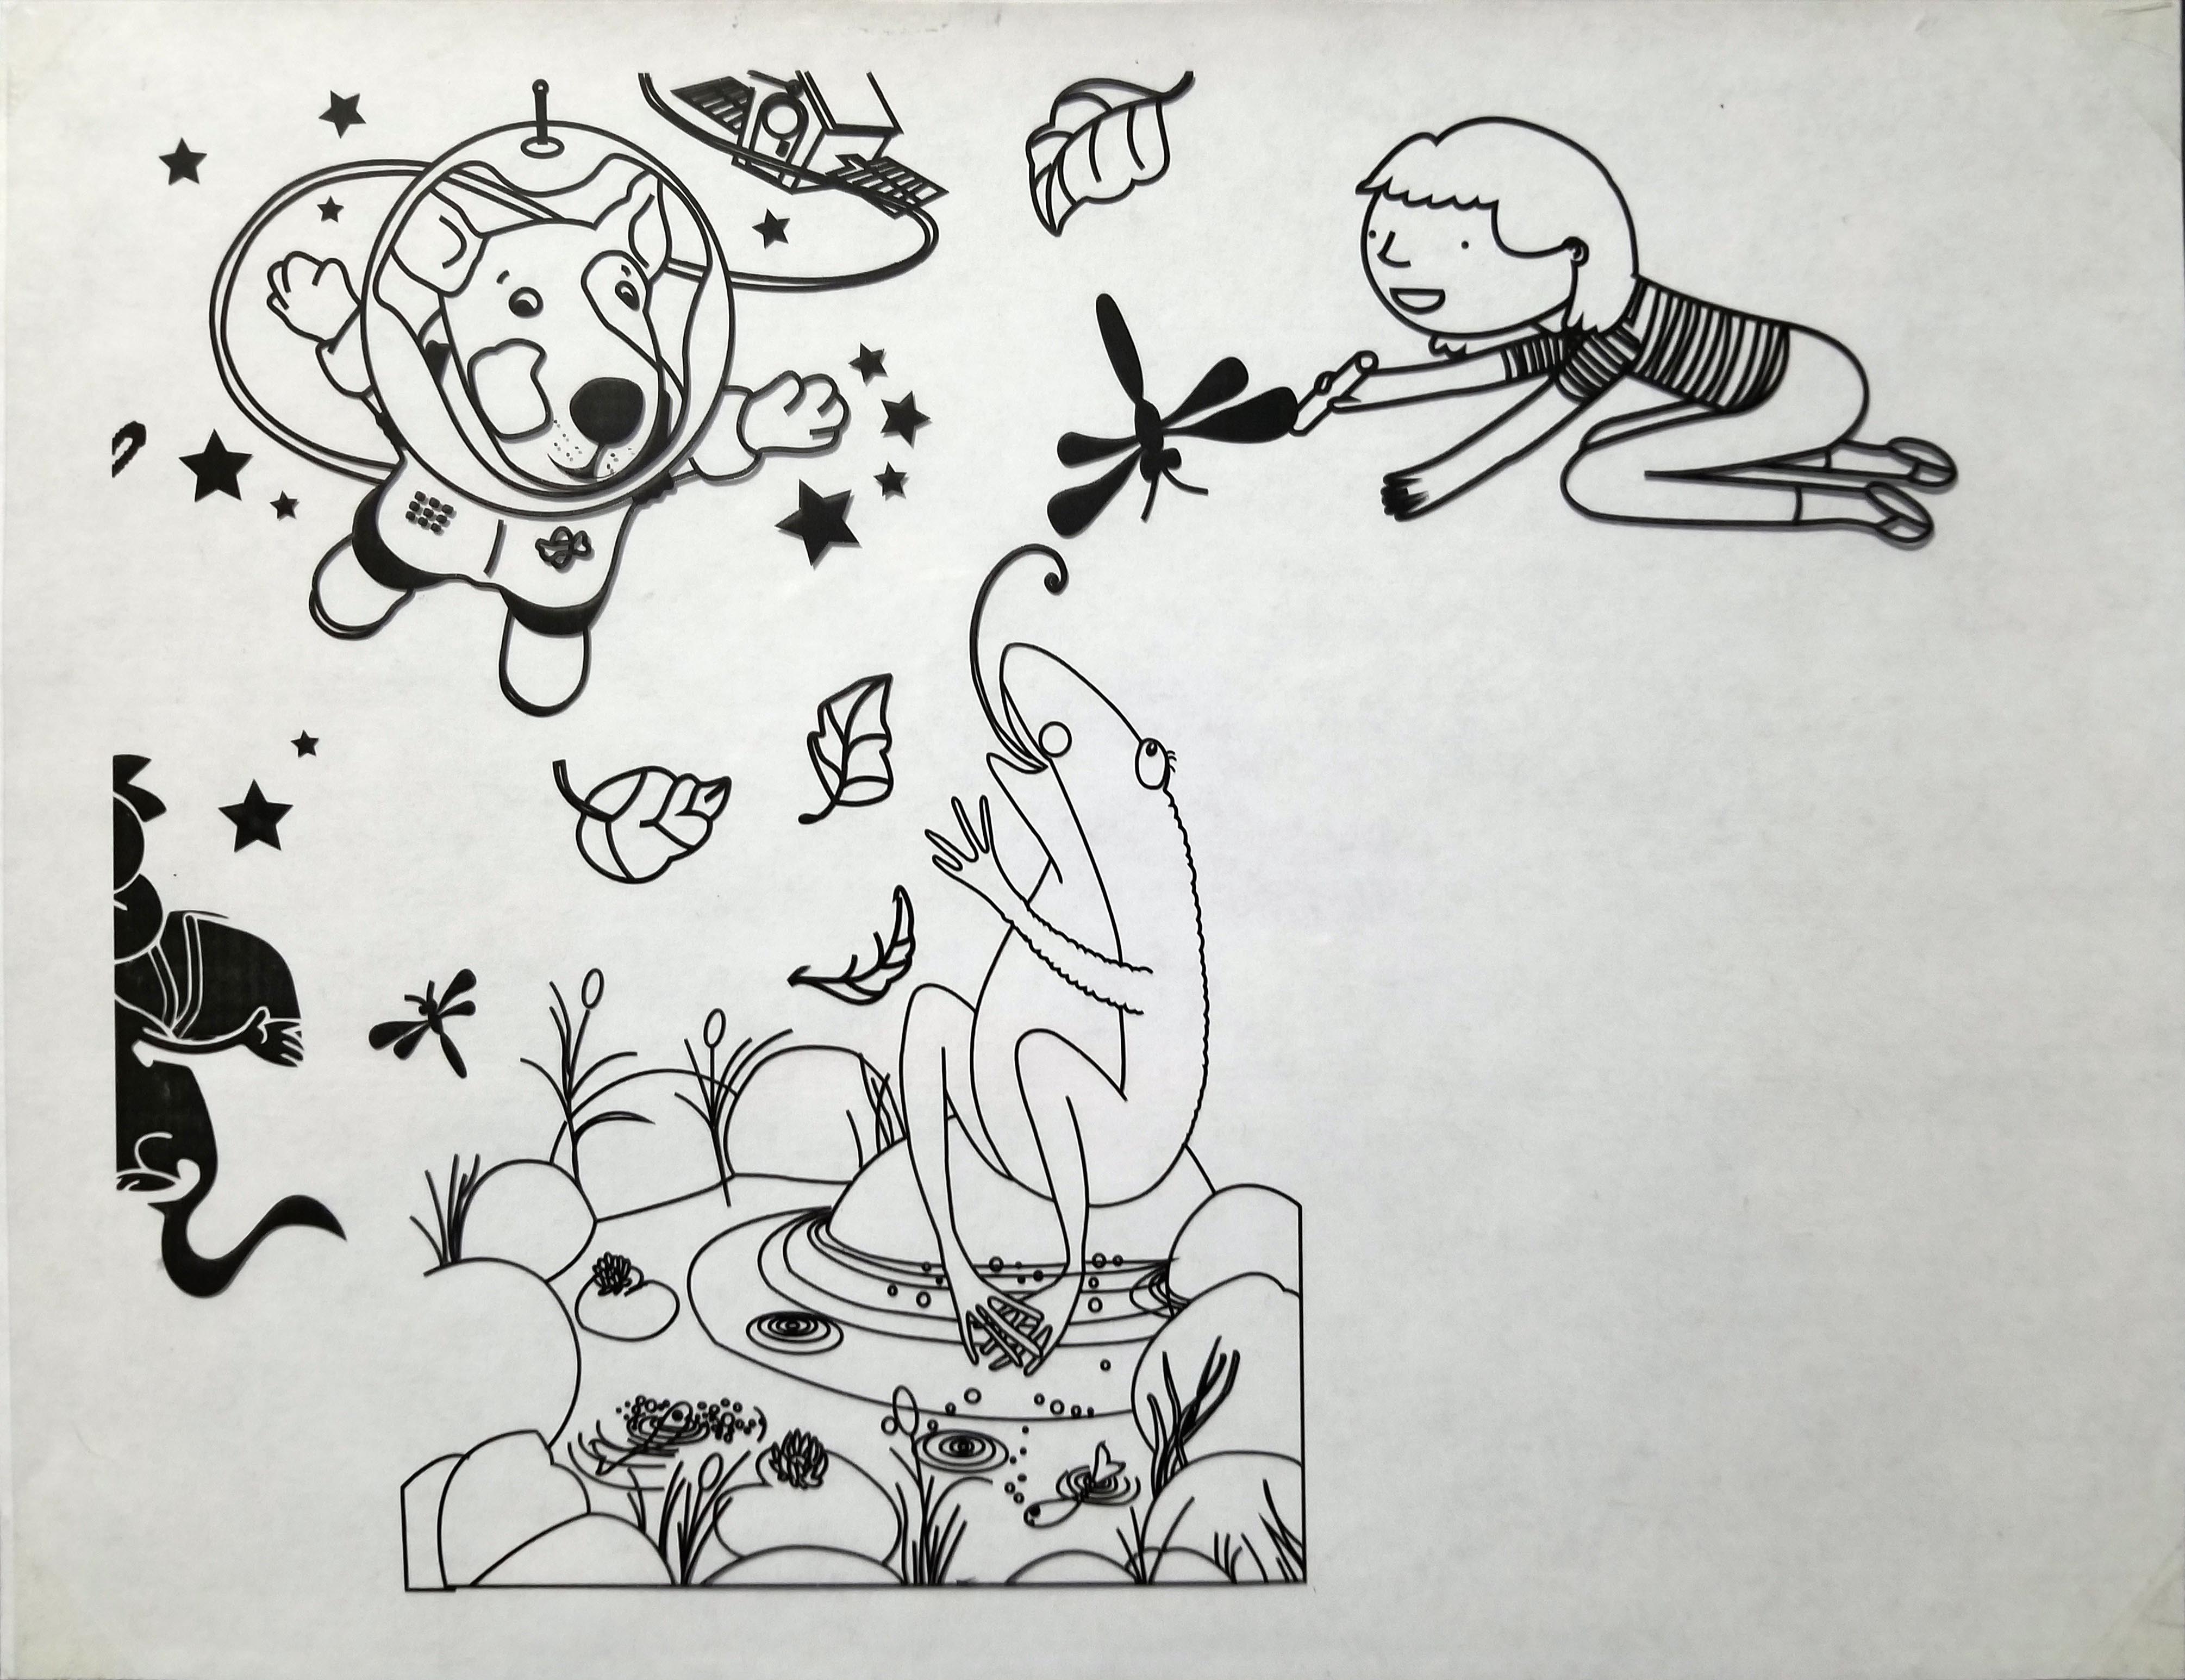
After selecting a direction, the next step was to begin creating the line art digitally. I began to pull each piece of artwork into Illustrator and started to trace the artwork that was going to be used. By creating a scaled down version of the wall the artwork was going to be placed on, I was able to accurately map out the placement for each piece.
Once I had the digital line art finished, it was then printed on transparencies to be projected onto the chalk wall. The artwork was printed in 3 sections because of it’s size; these sections could easily be projected and moved as needed. Before the drawing stage began, I first made sure that the artwork would span the entire wall as intended. Once I knew that it would work, it was onto my favorite part–the drawing stage!
You absolutely must have the right tools in your toolbox to start drawing. I used chalk wall markers of various sizes. The larger markers worked great for shading and the smaller ones helped to create precise details. By using chalk wall markers instead of regular chalk it is not only easy to correct any imperfections but also does not leave any of the dusty residue that common chalk leaves.
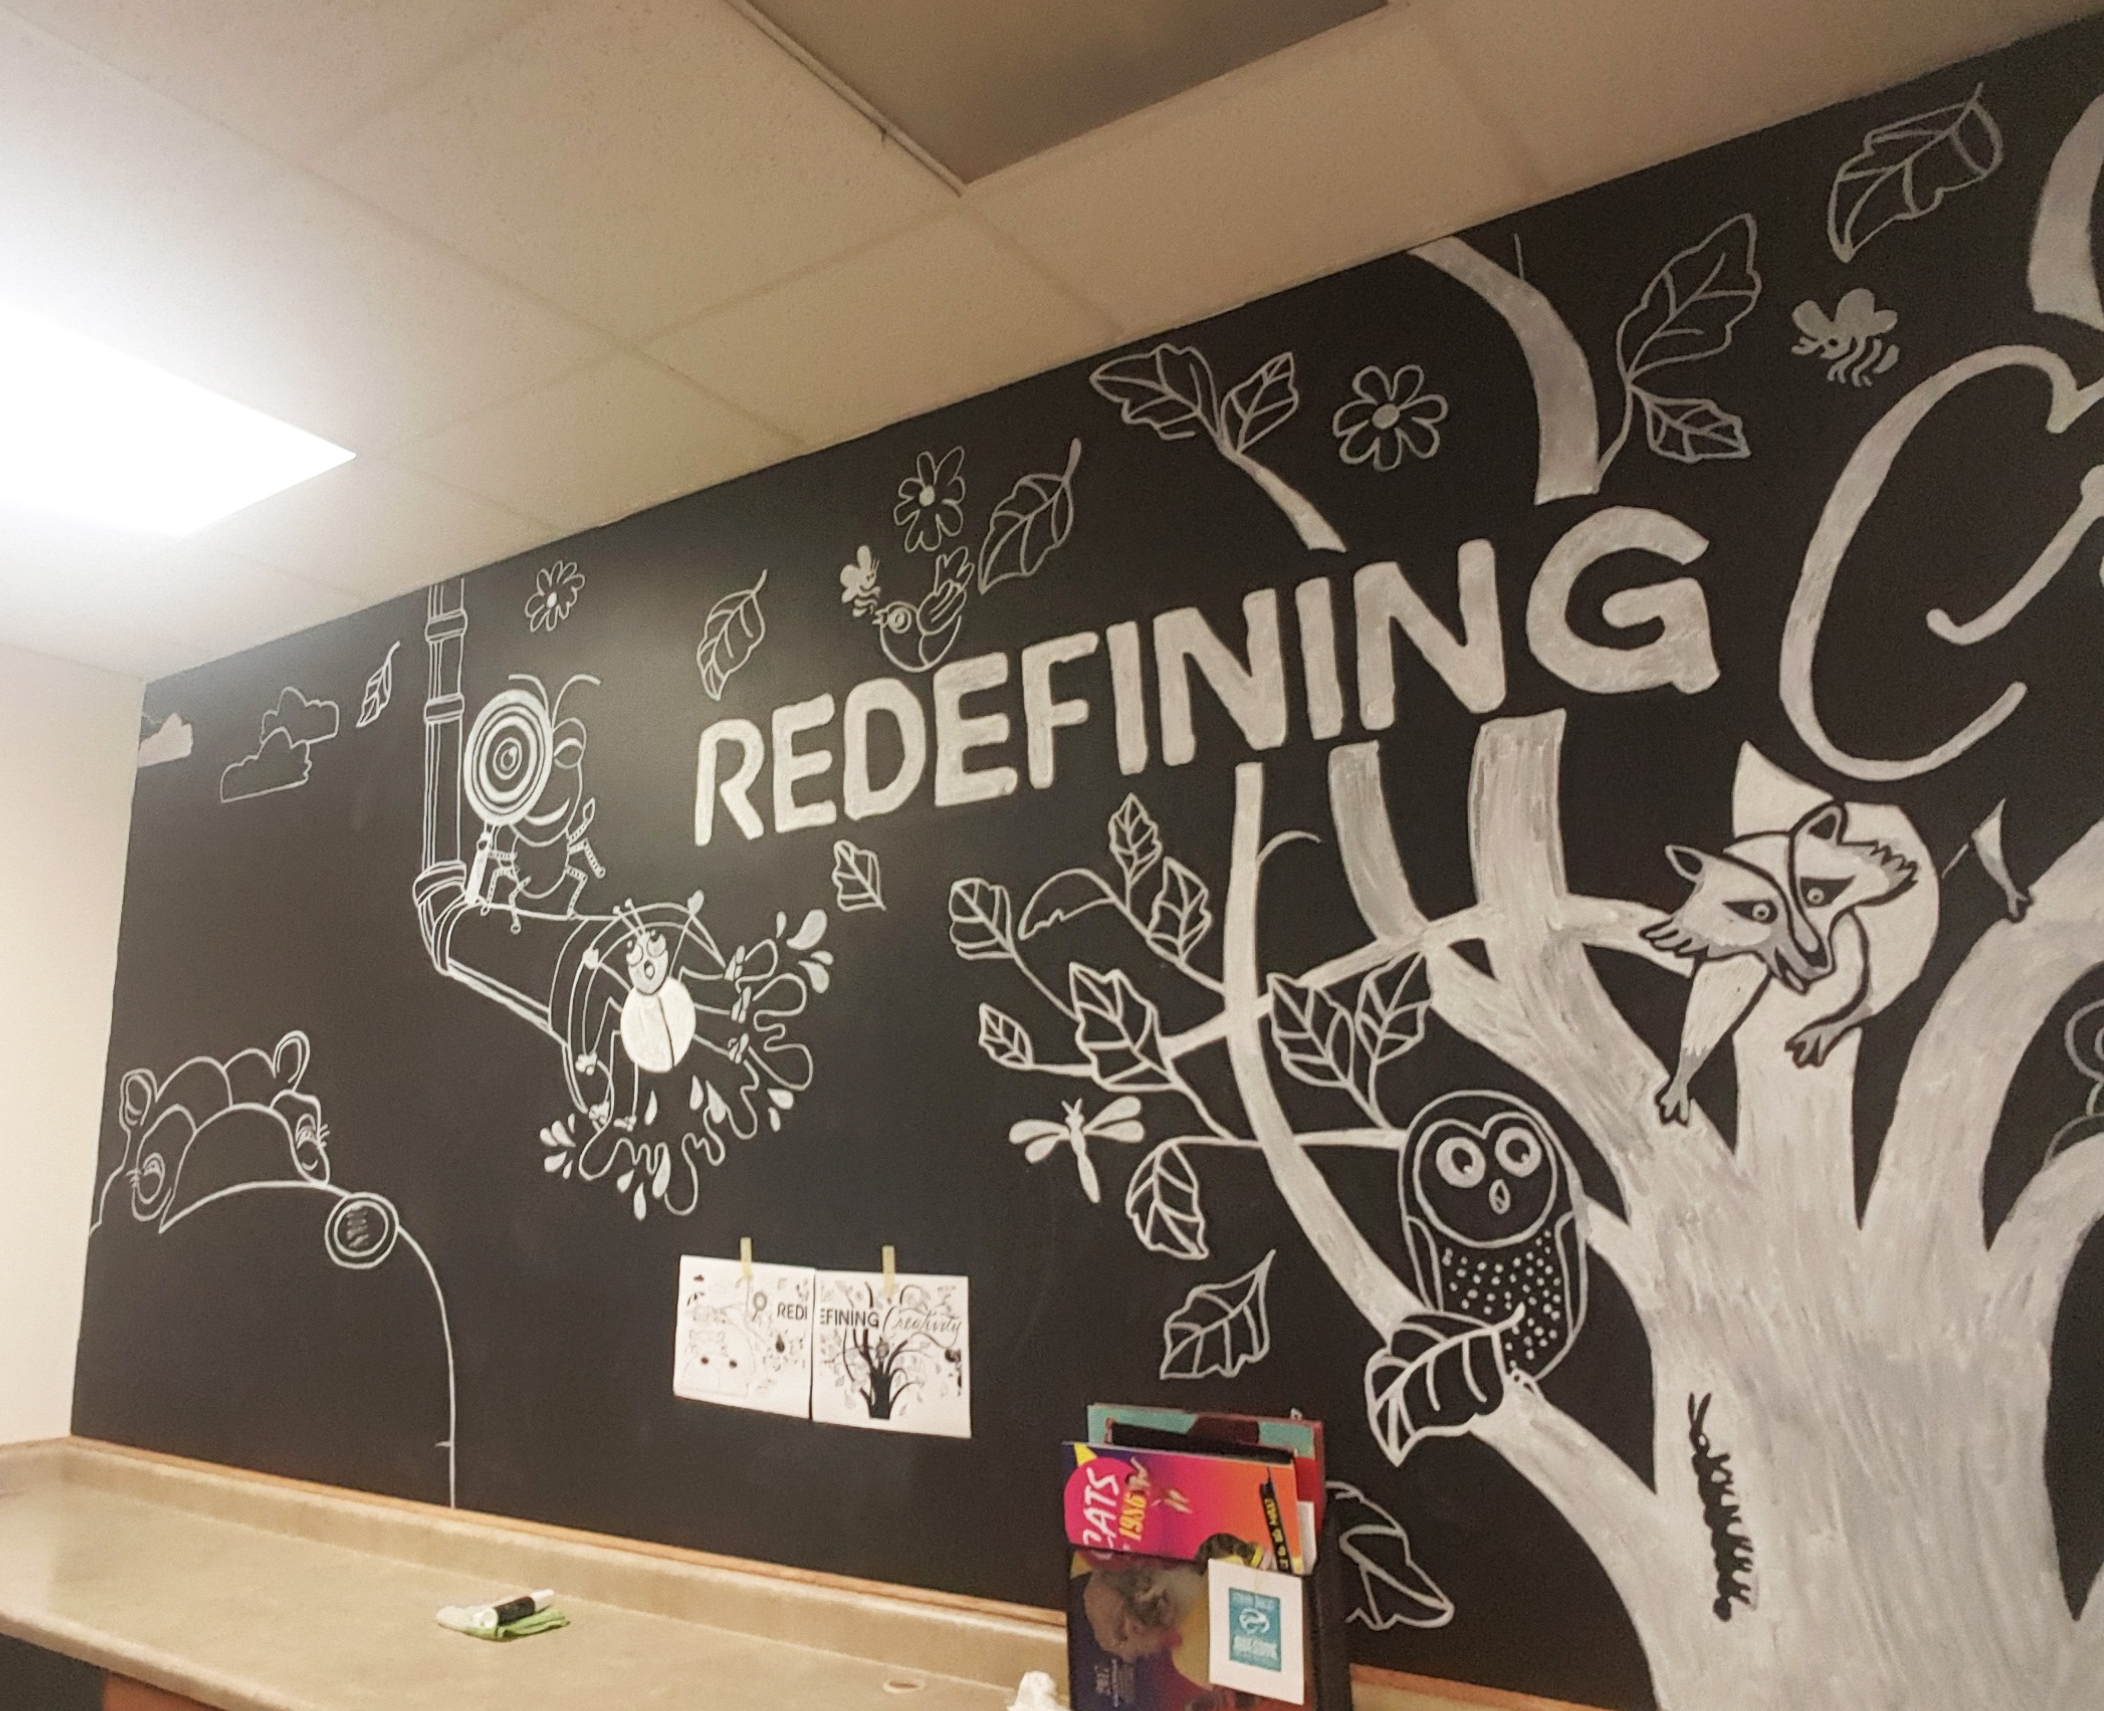
I started with the center section. I taped the transparency to the projector to make sure that it would not move during the process. I began to trace the outlines that were projected and filled in sections as needed. Day by day, I was able to see the progress I was making. Once the center section was complete, I shifted the right section of the wall, saving the left side for last.
Here are a few things I learned during this process:
- It is important to take breaks. (Your back and neck will get very sore from all the moving around.)
- Make sure to turn off the projector and turn the lights back on to check your work. It will look different with the lights turned on.
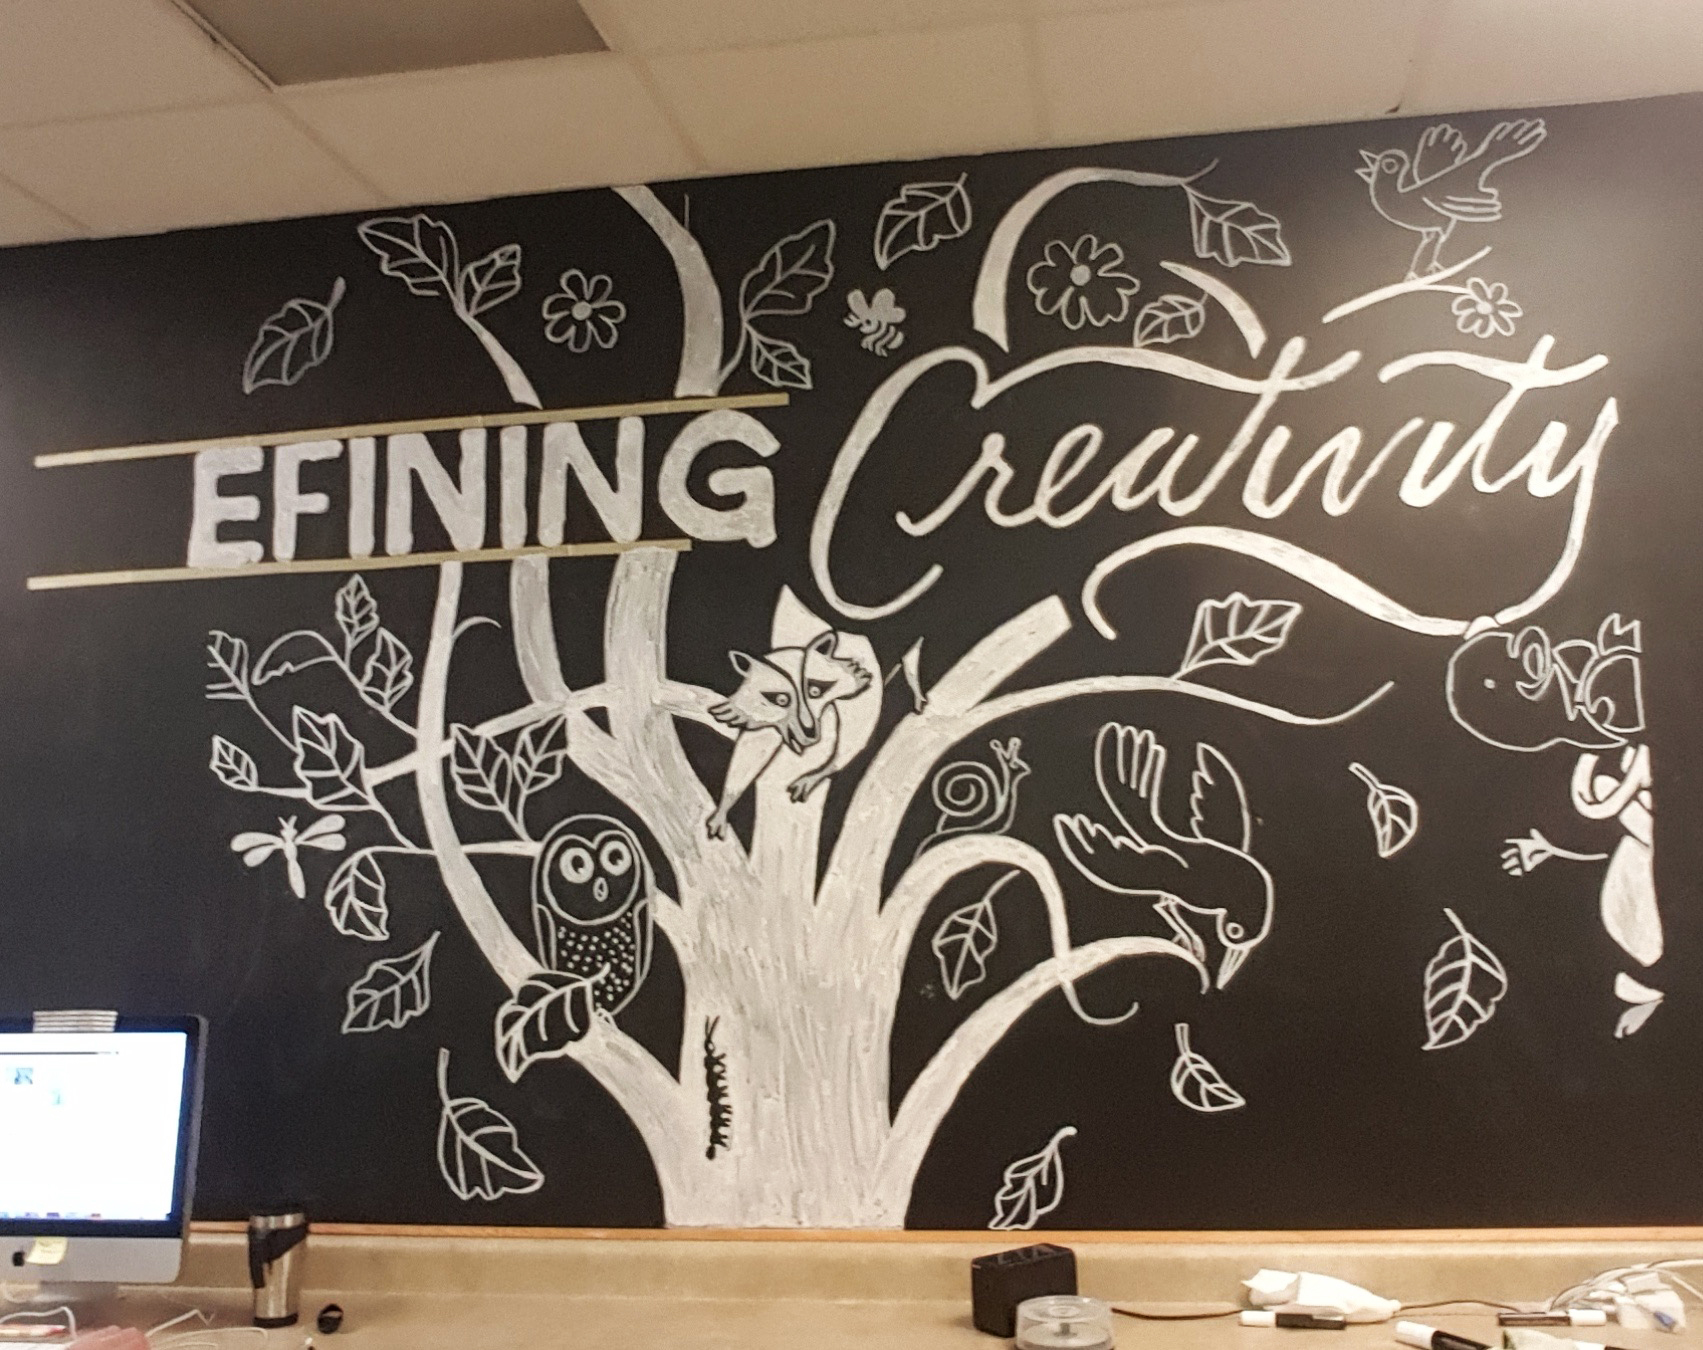
- Use painters tape as a guide to help make sure things are lining up correctly, especially if you are lettering too.
- Have a wet washcloth with you at all times in case there are any drips from the chalk marker or any imperfections you’d like to correct.
- Have fun, and don’t forget to take tons of pictures during your process! It’s not every day you get to draw on the wall!
Creating this chalk wall was such an incredible journey and an awesome opportunity filled with moments of joy, frustration and a bit of muscle soreness toward the end of the week. The best part of all is seeing my work across the whole wall every day when I come to work!
Special thanks to Kristin Resch for all of the help and guidance during this creative process. I couldn’t have done it without you!
 —Brittany Graf
Posted in: Design | Illustration
Tagged: art | behind the scenes | clients | Composure Graphics | creative | design | drawing | history | illustration | life at Composure | mural | office | opportunity | wall art
1 Comment
I’m glad you said it’s important to take breaks in between painting your mural. Reaching above your head all the time can put serious strain on your back and neck. It’s important to stop if you’re starting to feel sore or too tired.